Now, if I'm being honest, I've never watched a single video from Amrezy. I don't exactly have a reason why. It's just one of those things that I've never stumbled across and I've never sought it out.
But I'm a sucker for a highlight. Highlighters are my kryptonite in the makeup world. And this one is just so stunning, I couldn't pass it up.
This is a very firmly pressed powder. I have ZERO kick up when I use it. But it still is super metallic and pigmented when I apply it. The shade is literal perfection. I've seen pictures of this on deep skin and it's stunning. I am incredibly fair (fairer than I want to admit) and it isn't dark on my skin at all. I don't know how a single shade can work for such a wide variety of skin tones, but here we are.
This night that I first used this, I was going to a Harry Potter and the Sorcerer's Stone concert (the music was played by a live orchestra while watching the movie). I didn't want to distract from the film (hehe) so I went for a more subtle glow. Let me tell you it was still a banging highlight, but it was the perfect amount to give me a healthy glow and not blind everyone within a 10 mile radius (which is my usual goal).
Overall, this is a stunning highlight! And, it doesn't make my skin look textured AT ALL. I highly recommend you try it out. If you're on the fence, it will be releasing in store sometime in March. Go check it out, swatch it, apply some of it (I myself am waiting to see the bronzers and Soft Glam palette in person before giving that a go).
I think even if you're a makeup collector like me and have a HUGE collection (especially highlights) you might not feel the need to get it. I can say with 100% certainty that even though I do have a large collection, I do not regret this purchase one bit.
Have you guys tried out any of the new Anastasia Beverly Hills products? Which one's do you recommend?
As always, let me know what you'd like to see next!
Hello again! It's nice to talk to you all so soon! I'm here to present to you the second look I created for Valentine's Day t...
Hello again! It's nice to talk to you all so soon!
I'm here to present to you the second look I created for Valentine's Day this year!
I originally wasn't going to post multiple looks for one occasion, but I saw this photo on Instagram by @cakefacehaze and fell in love with the look.
I definitely lean towards the edgy/grungy side of makeup and fashion. So this smoky eye with glitter liner was a MUST.
This look ended up being a lot easier to execute than anticipated. I used all Colourpop pressed shadows and the glitter liner is NYX.
To start out, after priming my eyes and setting the primer with powder, I took Colourpop's Full Zip single shadow and dusted that all over my lid from my brow bone to my lash line. I then took Colourpop's Wake Up Call into my crease and a little higher as my base transition shade.
From here, I took Belair and used this to deepen up my crease just a hair. I then took Let's Do It and packed it all over my lid. I didn't pack it as heavy as I was going for a more grey blown out look rather than a jet black lid. I kept alternating applying the black shade and blending out the edges with a mixture of Wake Up Call and Belair. And Voila! Your shadow base is complete!
Now let me tell you, I don't know exactly why I was so gung ho on doing this look. I'm not great at winged liner. I always end up wiping it off and doing something without liner because I'm a perfectionist and it never turns out even close to perfect. But this... THIS WAS SO SIMPLE. I kid you not!
I spent a fair amount of time trying to figure out the best way to apply the glitter. Do I use a glitter primer? Do I use a mixing medium? Do I mix the glitter into the medium and/or primer? In the end I used NYX Multitasker Mixing Medium. I found the best way to get the desired look was to take a small angled brush and apply the mixing medium in sections and then applying the glitter to the product I had just laid down, prior to moving onto the next section. Again, I thought this would be more difficult as the medium is essentially clear. But it was a piece of cake! The specific glitter I used was the NYX Face and Body Glitter in Red.
I also recommend doing this before the rest of your makeup. I was able to take a cotton pad with my Bioderma and make the wing super sharp. It also helps when you can easily clean up any potential glitter fallout.
I wanted to keep the look with a rosy tone, so to finish off my face makeup I took the Benefit Dandelion Dew and blended that out on my cheeks. I never reach for this product and I don't know why. Whenever I do break it out again I always LOVE the look. For my highlight I used Jouer's Rose Gold powder highlight. Jouer powder highlights are some of my favorite.
To tie everything together, I applied Kylie Cosmetics Posie K lip kit. This was the perfect lip color for this look.
Did you prefer today's look or yesterdays? I don't think I can decide!
As always, if there's anything specific you'd like to see from me, let me know!
February 12, 2018
Hello friends! It's that time of year again... the countdown to one of the best days of the year begins! Half Priced Candy Day! If you...
Hello friends! It's that time of year again... the countdown to one of the best days of the year begins! Half Priced Candy Day!
If you're someone who loves Valentine's Day, I've created this look to hopefully give you some inspiration for your date night with that special someone.
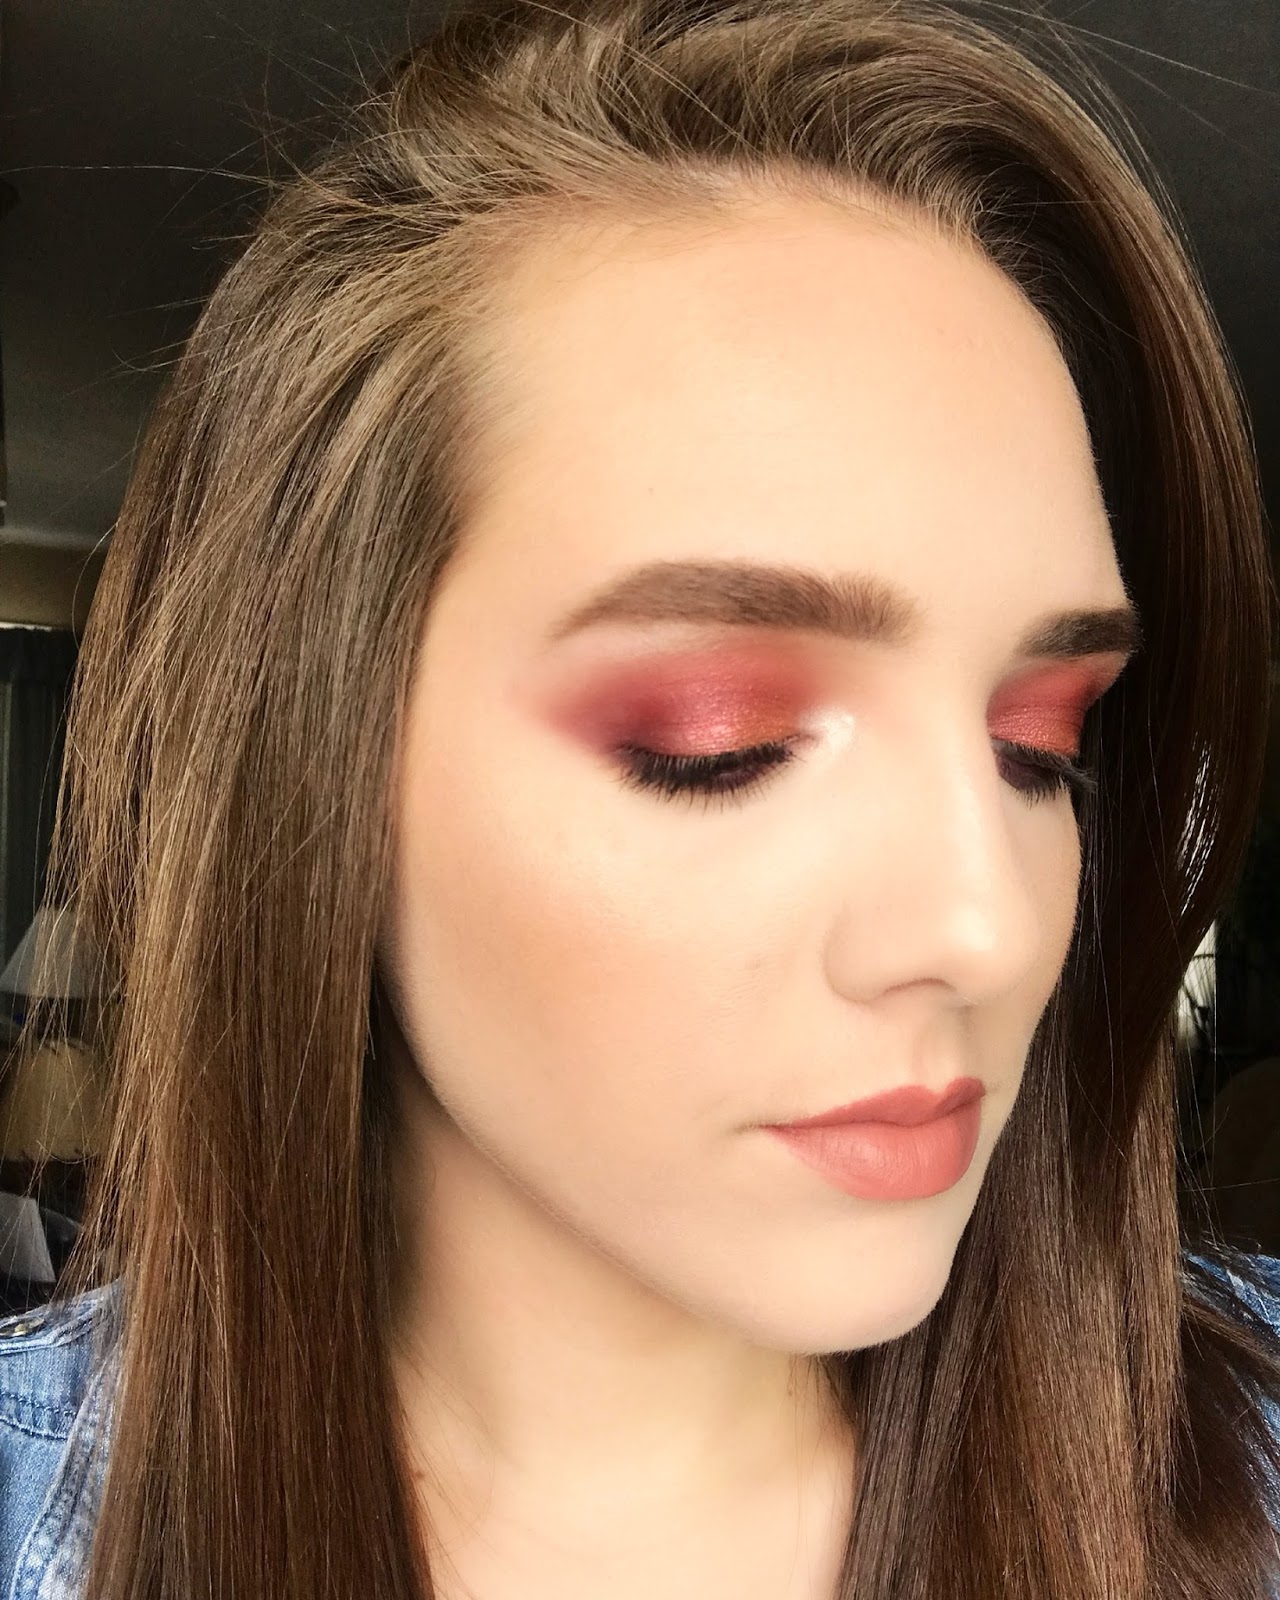
When I sat down to create this look, I knew that I wanted something rosy and typical of Valentine's day in terms of color. But at the same time, I wanted to go for something a little more bold. I immediately knew I had to utilize my Morphe Brushed 39A Dare to Create palette. This was limited edition for the holidays and is unfortunately unavailable. But you can use any palette with bold berry colors.
To start out, I took the first shade from the Morphe 39A Dare to Create palette as my first transition shade. To deepen up the transition shade just a hair, I took the second shade and applied it in almost the exact same spot, just a little bit lower. At this point, I started to add some color. I took the third shade and placed it over the second shade. I used this shade VERY lightly as it is a very bright bold berry shade. To start to deepen up the crease and outer v, I took the fourth shade and placed this a little lower than the third shade. I focused this mainly in my outer v and in the outer third of the crease. To finish the crease, I took the fifth shade and focused this entirely in the outer v and took the slightest amount of product that was left on my brush into the crease just to blend the shades together.
The shimmer shades in this palette wasn't exactly what I was looking for. So I reached for my Colourpop She Palette. I used the shade Gal all over my lid. This is a slightly duo chrome shade. It has a gold/rose gold shift to it that is so gorgeous. I threw the Urban Decay Alkaline 24/7 Eyeliner in my waterline and blended some shades from the 39A Dare to Create Palette on my lower lash line.
I finished off the look with MAC's Soar lip liner and Velvet Teddy lipstick. Is there a more classic go to pinky-mauve lip color? I think this matched the eye look perfectly. I was super happy with how this look turned out!
As always, if there's any looks or products you'd like to see me review, let me know! Keep your eye's peeled for a second Valentine's Day look going up tomorrow!
Other Makeup Details:
Foundation: Too Faced Peach Perfect Comfort Matte Foundation (Snow)
Contour/Bronzer: Tarte Park Ave Princess Chisel Palette
Highlight: Dose of Colors Desi X Katy Fuego/ Smashbox Spotlight Pearl Palette
February 05, 2018
Happy new month, cyber friends! Can you believe January is over already? Summer will be here and gone before you know it. We all know it...
Happy new month, cyber friends! Can you believe January is over already? Summer will be here and gone before you know it.
We all know it's award season. The night of the Grammy's I was scrolling through Instagram and saw a picture Hailee Steinfeld posted. Which of course led me to scrolling deep into her Instagram (we all know how that goes). And I came across this boomerang she had posted and instantly decided I needed to recreate the look.
I love how simple it is but it's so stunning and glam.
As soon as I decided to recreate this look, I started rummaging through my collection to try and find the best matches that I could. And let me tell you, I think I nailed it.
You can pretty much use any transition shades you want just to create some depth to the look so it's not just glitter on your eyes (not that that would be a bad look).
I pulled out my Tartelette In Bloom eye shadow palette. This has been my go to recently whenever I need a few basic transition shades. I started out with Smarty Pants as the main transition shade taking this almost all the way up to my brow bone. I then grabbed Jetsetter and placed this a little bit lower to add some extra depth. Then finally for my outer v and the lowest part of my crease, I used the shade Rebel. I love these shadows because they always do exactly what I need.
For the main act, I grabbed my Stila Glitter & Glow shadow in the shade Smoky Storm. This is the perfect taupe champagne shade for this look. To make this more diffused and not as opaque, I just put some on the back of my hand and took my finger to apply it to my eye. I think it created the perfect opacity and shimmer to match the original look.
Finally I took my NYX Tres Jolie liner in my water line and tight line and smudged it out with a black shadow (I can't remember the exact one I used). I also took my definer brush and put some on my lid right against my lash line to give a quasi smoky liner look. Apply mascara and you're good to go!
To finish off the look, I needed a nude but kind of glossy lip. I knew just the PERFECT product! The new L'Oreal Colour Riche Shine Lipsticks are INCREDIBLE! I had used these pretty much exclusively through the month of January. They are literal perfection! For this look in particular, I used the shade Glossy Fawn. I HIGHLY recommend trying at least one of these! Glossy Fawn and Dazzling Doe are my favorites! If you want to see swatches first, check out Tati's review of them here. She goes through EVERY shade in the line.
What celeb makeup looks are you loving? Which looks would you like to see from me next?